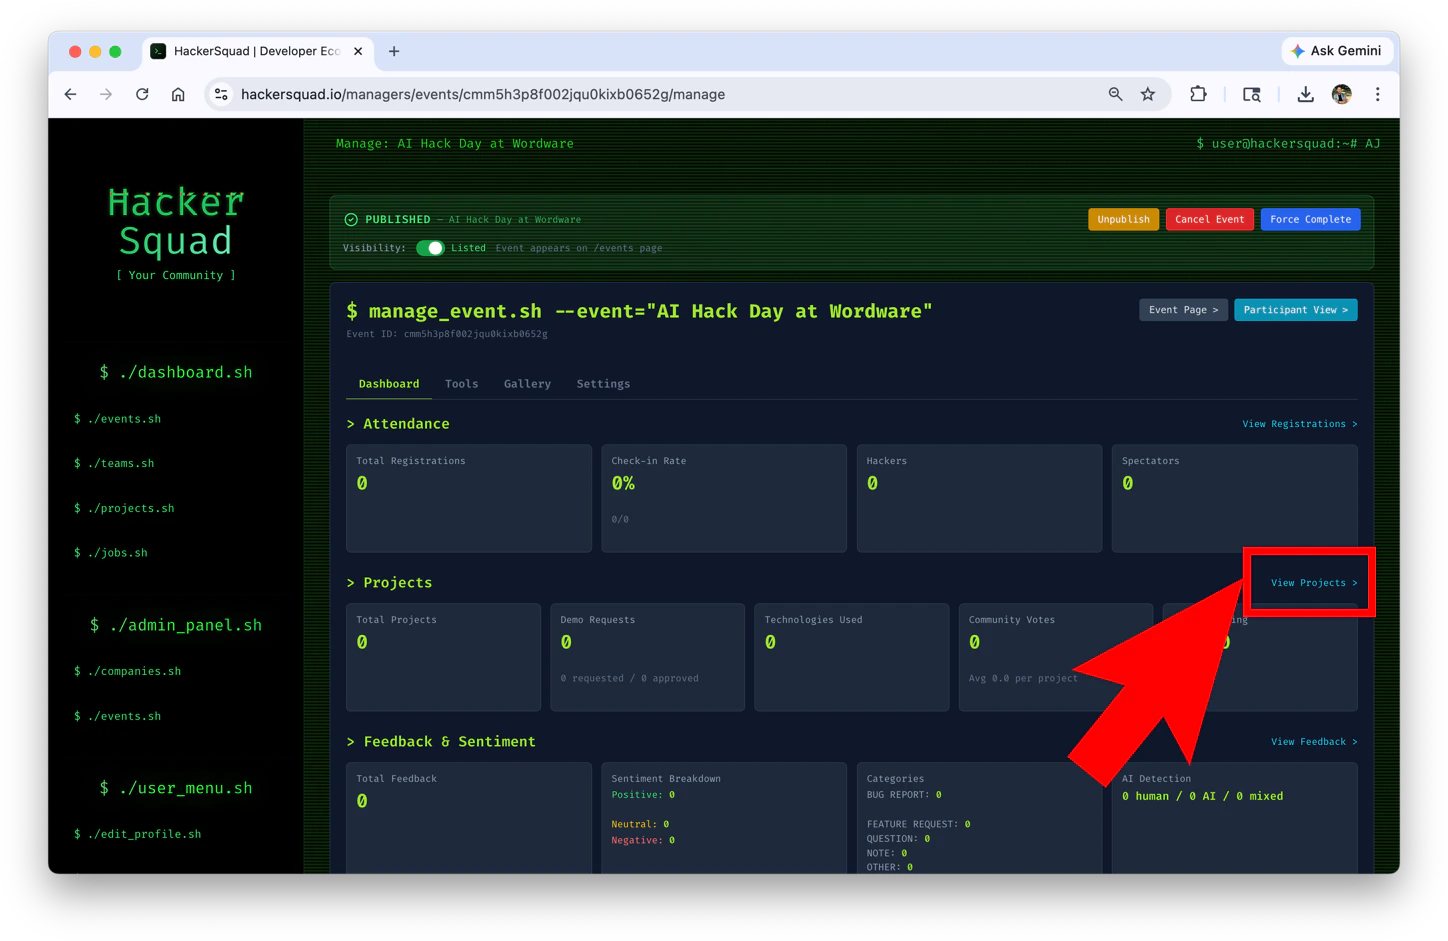
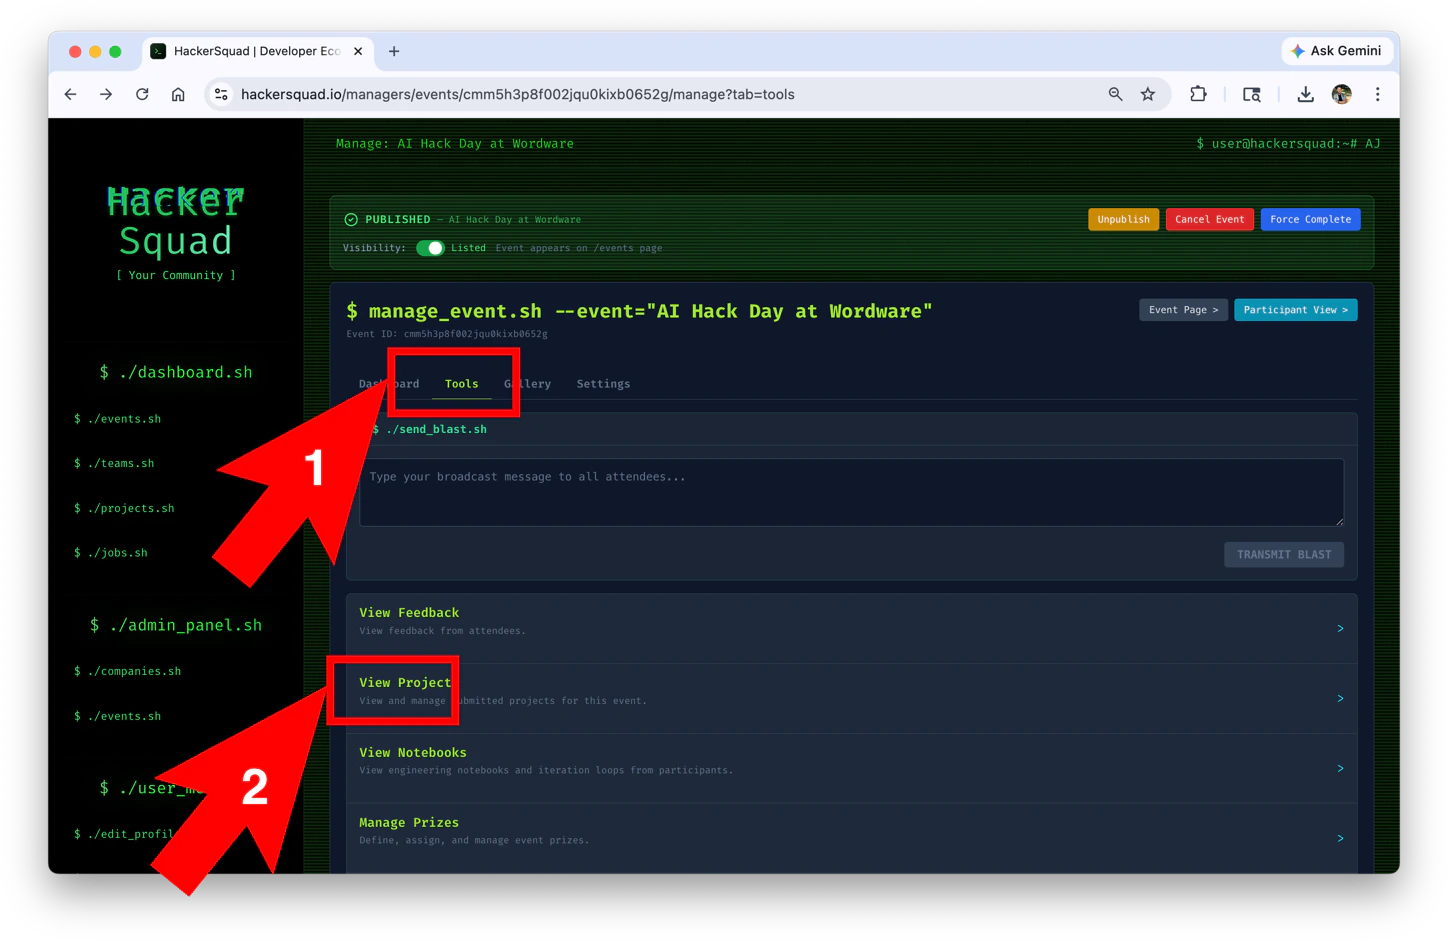
You can view projects on the free plan.
| Option 1 | Option 2 |
|---|---|
 |  |
Project List
The projects are laid out in a vertical list of expandable projects. There are icons for company logos that indicate what each tool was used in that particular project. The selectable list of companies are the added partner companies in that event.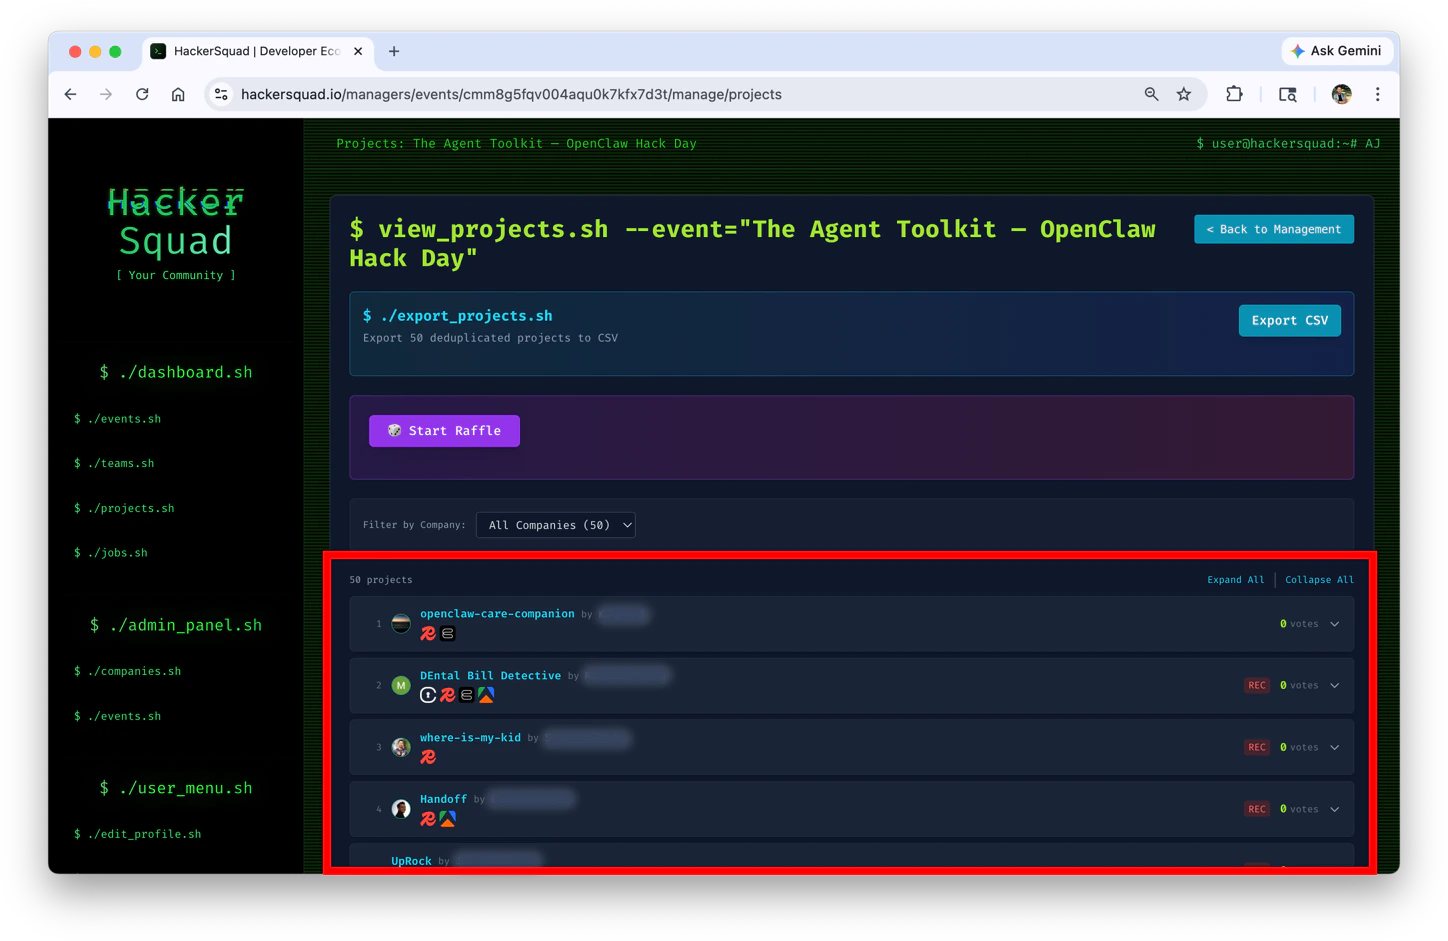
| Element | What it shows |
|---|---|
| Filter by company | Use this dropdown to narrow the list to projects that used a specific partner company. |
| Project count | This shows how many projects match the current filter. |
| Expand all / Collapse all | Use these controls to open or close every project in the list at once. |
| Project row | Each row shows a project’s name, ranking number, and builder information. |
| Tool logos | These icons show which partner tools were used in the submission. |
| Votes | This shows the current vote count for the project. |
| Expand arrow | Click this to open the full project details for a single submission. |
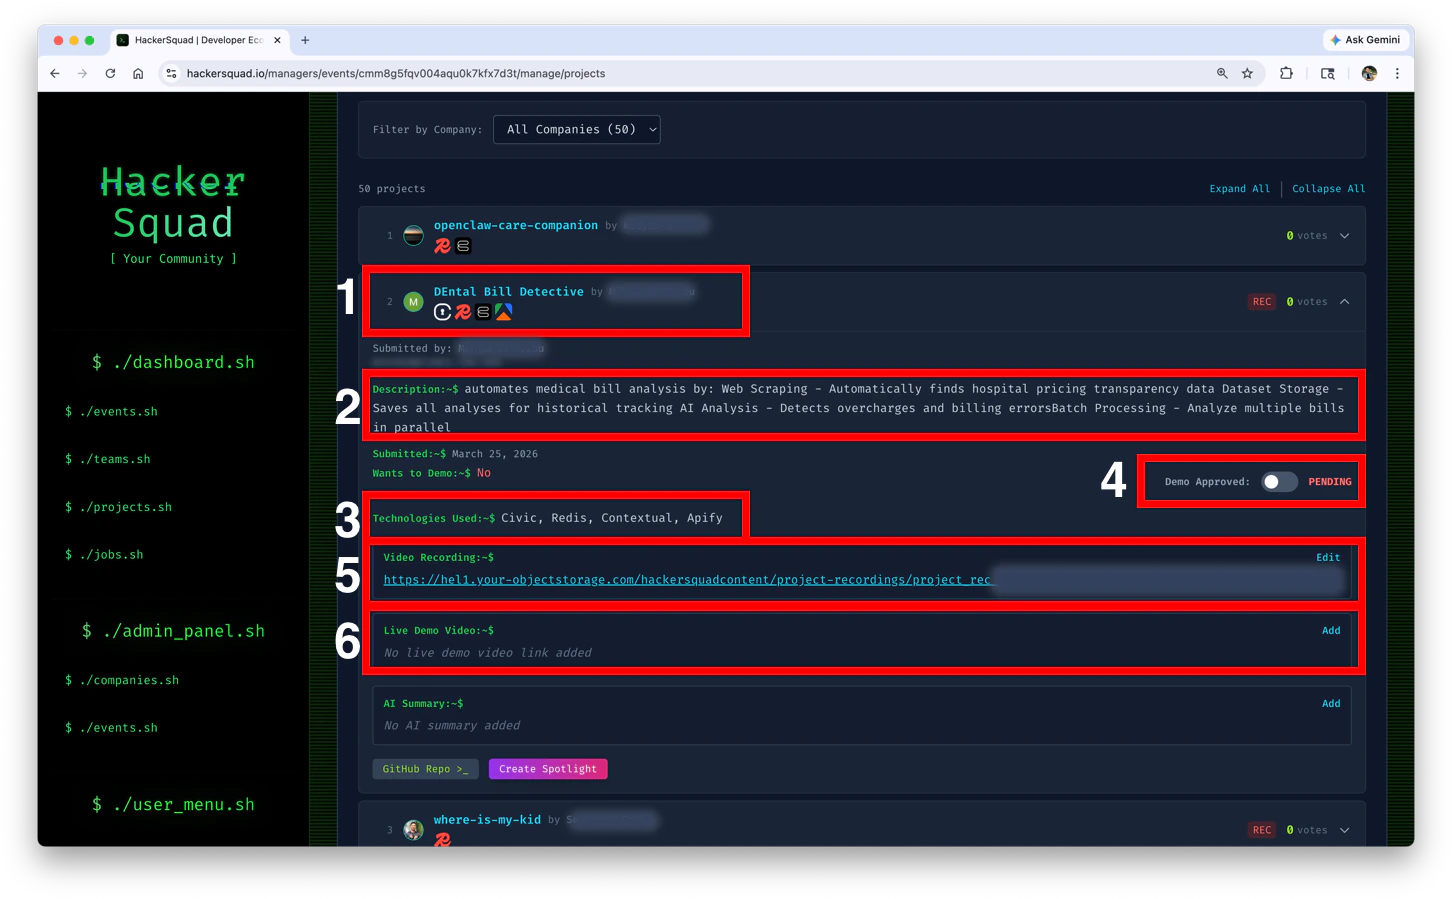
Expanded Project View
| Box | What it shows |
|---|---|
| 1 | The project header. This area shows the project name and the tool logos associated with that submission. |
| 2 | The project description. Use this section to understand what the team built and what problem they are solving. |
| 3 | The technologies used field. This shows the tools and platforms the team selected for the project. |
| 4 | The demo approval status. This control shows whether the project demo has been approved yet. Approved projects get a presentation button to demo live. |
Next steps
Send event blast
Send updates that point builders to resources and important event information.
Manage feedback
Review builder feedback and export the results after submissions come in.